How DevOps helps your Company to Grow?
When DevOps arrived onto the technology platform, industry experts opined that it is going to revolutionize the IT world. However, businesses were slow to embrace this methodology. The reason was that many businesses could not understand what DevOps is actually about. As it is not a tool or a technology, people derive their own definitions, processes and methods. DevOps is a methodology that integrates Development and Operations teams to work as a single entity right through the product lifecycle to deliver quality software faster. According to Research Dive, the global DevOps market was valued at $4.46 billion in 2020. This value is expected to reach $23.36 billion by 2027, growing at a CAGR of 22.9% during 2020-2027.
Here is how DevOps helps your company to grow:
Redefining Organizational Culture
While DevOps started off as a combination of development and operations teams, it has now evolved to include everyone involved in the product lifecycle. DevOps brings cross-functional teams into the picture comprising people from design, development, QA, operations, security etc. It facilitates seamless collaboration and trust between teams, breaking silos. With rightly aligned priorities and shared goals, every member of the team gains clear visibility into the progress of the project, resulting in a quality product delivered in time. It gives you better control over tools, processes and projects.
Redefining Technical Processes
Faster time to market is a key requirement to stay in the competition in today’s fast-paced world. However, speed shouldn’t kill the quality. DevOps allows you to deliver faster while not compromising on quality. Continuous Integration / Continuous Delivery (CI/CD) is a notable feature of DevOps.
In a traditional waterfall software development model, developers write the code first which is then sent to the testing team. If there are errors, the code is returned to developers for corrections. When the code successfully passes the test, it is sent to the staging environment and then deployed to production. To deliver an update, the product has to go through the entire process again.
With the advent of Microservices and agile methodologies, developers started developing the software as modular independent services in smaller and incremental cycles. DevOps helps businesses to manage microservices, SOA and agile environments in a better way. It integrates different disparate systems to work as a cohesive unit. It allows you to build a CI/CD pipeline and automate the entire process.
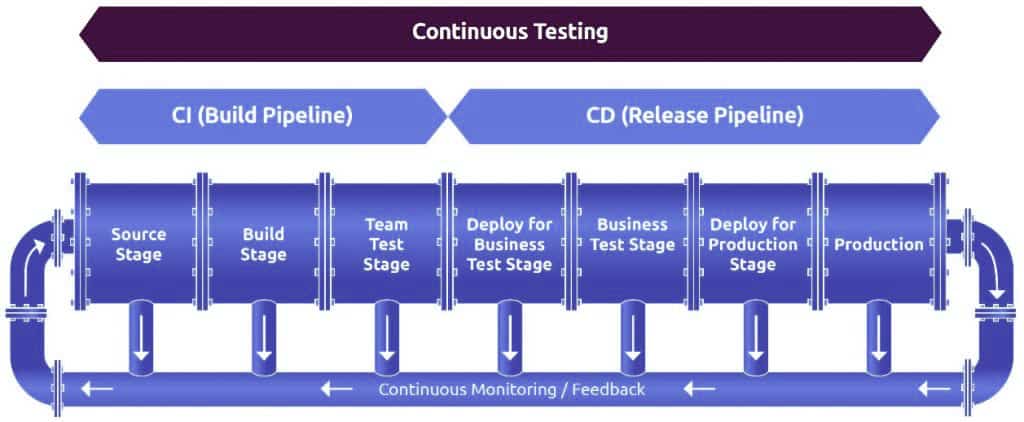
In this CI/CD pipeline, coders write the code and commit it to a version control system that acts as a central repository. When a change is detected, the CI server automatically runs the builds. Passed builds are moved to the deployment segment or the image repository. The automation deployment tool picks the artifacts from there are deploys them to production. There is a continuous monitoring tool that offers feedback from which you can gain clear insights into the performance of the product. By using value stream mapping, you can quickly identify bottlenecks and optimize every process. Response times get quicker too. With continuous integration, continuous testing, continuous deployment and continuous feedback, DevOps enables you to quickly deliver quality software.
Jenkins, Gitlab, CircleCI, TeamCity and Bamboo are some of the best CI tools that help you to automate and orchestrate the entire software development product lifecycle.
Redefining Business Processes
DevOps brings a cultural shift across the organization. Now, developers understand the challenges faced by the Ops guys and develop the code accordingly. Similarly, operations guys are aware of how the code is being developed and how it performs in production at an early stage. As each member is responsible for the overall quality of the product, every team equally cares for the efficient execution of tasks of other teams. They motivate and encourage other members wherever possible. With a cross-functional team working together, employees are cross-trained and up-skilled as well. It not only brings more value to the organization but also delivers more value to your customers.
Innovation is a key requirement to stay ahead of the competition. DevOps gives developers extra time to experiment and create new products or tweak existing products. With automated testing and automated security built into the pipeline, you don’t have to worry about breaking anything. Without disrupting the project, developers can validate the feasibility of ideas and introduce innovation into business processes. It also helps them learn customer requirements and user experiences in a better way and meet/exceed their expectations. Enhanced customer satisfaction helps you retain your customers and gain new referrals too.
The Bottom Line
DevOps benefits are equally distributed across the business, technical or cultural segments of an organization. A good DevOps strategy helps an organization sustainably grow in all aspects of the business. However, streamlining an end-to-end delivery pipeline is a challenge. Once the right DevOps strategy is designed, you can fully leverage all these benefits.
The key here is choosing the right DevOps partner!

Cloud Development – All You Need to Know
In today’s cloud era, every IT resource is hosted in the cloud and delivered over the Internet via a pay-per-use subscription model. While the amazing benefits offered by the cloud have inspired the software industry to embrace cloud development, the recent pandemic has forced everyone to move towards the digital world. As work-from-home environments are here to stay, cloud development has now become more important than ever.
What is Cloud Development?
 Cloud development is about developing software applications using computing infrastructure that is hosted in the cloud. Instead of building and managing your servers and physical hardware, you can access technology services hosted in the cloud via a pay-per-use model.
Right from servers, data storage and network resources to OS, Middleware and Run-time environment, everything can be accessed over the Internet.
In addition, you gain access to ready-made cloud solutions for monitoring, analytics etc. Amazon is a leading provider of public cloud solutions while VMware tops the private cloud services segment.
Cloud-based apps are highly scalable and flexible. They can be accessed from any device, any location using APIs. The app data is stored in the cloud and resides on the user’s device as a cache enabling the user to work offline. When the app is connected online, the cache data gets updated. Google Docs, Evernote, Canva, Dropbox are a few popular examples of cloud-based apps.
Why is Cloud Development Popular?
Cloud development offers amazing benefits to organizations. Firstly, it eliminates the need to invest heavily in on-premise infrastructure and licensing costs. With a pay-per-use model, you can only pay for the services used. It gives you access to cutting-edge technologies at cost-effective prices. Secondly, cloud development facilitates seamless collaboration between teams located in different geo-locations. Thirdly, cloud development offers high scalability, flexibility, unlimited storage, faster time to market and automatic recovery options. In addition, it automatically updates the software and performs maintenance which means you can focus on building quality software products.
Amazon Web Services (AWS), Microsoft Azure, Google Cloud Platform are the leading providers of cloud development solutions.
Web Apps are not Cloud Apps
Often, cloud development is confused with web development. It is important to understand that all cloud apps are web apps but all web apps are not cloud apps. To be precise, cloud-based apps are an advanced version of web-based apps. Web-based apps depend on browsers and scalability and customization is limited. The data is stored on a single data server. You can’t work offline with web-based apps. On the other hand, cloud apps are highly scalable and customizable. The data is stored across multiple data-centers using replication techniques and you can work offline as well.
Cloud Development Challenges
While cloud development seems a great option, it comes with certain challenges. Cloud development demands seamless collaboration between different teams such as developers, designers, QA managers, data analysts, DevOps engineers etc. The project involves different cloud technologies such as AWS, Azure, GCP etc. So, people working on cloud apps should have good knowledge about various platforms and be able to integrate apps with different services using APIs.
Secondly, cloud development brings security concerns. As such, security should be implemented right into the CI/CD pipeline so that it can become a part of automation. It is recommended to separate app data from app architecture code. Thirdly, cloud development offers higher scalability. However, scalability that is not optimized will overrun your cloud budgets. As such, it is important to have clear network visibility to gain better control over cloud infrastructure.
Conclusion
Mobility solutions, disaster recovery, Flexibility and reduced workloads are some of the key drivers to cloud adoption. However, cloud development requires expert knowledge of cloud technologies. When rightly implemented, cloud development improves your operational efficiencies and optimizes costs while improving user experience.

Top 5 benefits of cloud-based software development in 2021
 The advent of cloud computing technology has disrupted the technology world. Today, it is a challenge to identify a service that is not delivered over the cloud.
While every industry benefitted from this technology trend, the software segment was one of the first industries that started leveraging this trend. The buzz around cloud-based software development is increasing year after year.
2021 is not going to be any different. Together with AI, cloud technology is helping businesses deliver quality products that are transforming the world.
Here are the top 5 benefits of cloud-based software development in 2021.
1) Operational Efficiency at its best
While enterprises have the budgets and expert staff to use a technology stack that comprises cutting-edge technologies, small and medium companies have to adjust with legacy tools. However, cloud solutions bring everyone onto the same ground. With minimal investment, you can lay hands on world-class technology solutions to increase efficiencies and be competitive.
Another significant benefit of cloud-based software development is fast and automated deployments. Developers can build continuous integration (CI) / Continuous Deployment (CD) pipelines and automate the entire process to easily build and deploy applications. Similarly, cloud-based apps can be effectively monitored. Based on predefined KPIs, you can analyze the performance of each application using cloud-based monitoring tools. The server logs help you identify issues and improve the efficiency of the product.
2) Mobility at its best
One of the biggest advantages of cloud-based software development is mobility. Regardless of your location, platform or device, cloud resources can be accessed by every authorized user 24/7. While the software team can remotely work on the product, endusers can access it from anywhere, anytime. Not only does it facilitate seamless collaboration between different teams, but it increases productivity as well. Considering the post-covid lockdown situations, mobility solutions have become a key requirement of every software development project in 2021.
3) Adaptability at its best
When it comes to cloud technology, innovation happens at a rapid pace. Today’s innovation can become tomorrow’s legacy. As such, businesses should proactively monitor technology trends and quickly incorporate necessary changes to their existing technology stack. Being future-proof is the key to sustaining your business operations. Cloud-based software development offers the flexibility to quickly realign product architecture and stay ahead of the competition.
4) Cost-optimization at its best
Cost savings is a huge benefit offered by cloud-based software development. You don’t need to invest in expensive physical hardware and licensing fee. You don’t need to worry about maintenance and updates as well. Right from provisioning the infrastructure to maintenance and security, the cloud provider handles all infrastructure-related tasks. It means you can quickly start delivering quality products. Cloud solutions are delivered via a pay-per-use subscription model. This feature enables you to dynamically scale up resources. Moreover, a lesser carbon footprint means a better world.
5) Scalability at its best
In a software development project, different teams have different resource requirements. For instance, developers require demo production environments to check the performance of a product. When you set up physical infrastructure, scaling up resources becomes expensive and time-consuming. Cloud infrastructure enables you to instantly scale up resources while only paying for the resources used. Similarly, Ops teams can ramp up production during peak hours and scale down during odd hours. The most important thing is that scaling can be automated.
However, it is important to consider that cloud-based software development is not easy compared to traditional software development. Security and privacy have to be prioritized. The lack of expert staff can be a big challenge for companies in fully leveraging this trend. When rightly done, cloud-based software development in 2021 keeps your business future-proof.
Top 10 Myths about Software Product Development
 As businesses are embarking on the digitalization journey, software solutions have become a central point of all business operations.
According to Grand View Research, the business software and services market earned a revenue of $389.86 billion in 2020. This value is expected to grow at a CAGR of 11.3% between 2021 and 2028.
Right from the time when FORTRAN was released in the 50s, the software industry has been a favourite vertical for many.
At the same time, several myths and misconceptions are floating around this space.
Here are the top 10 myths about software product development.
1) The Most Popular Language is the Best One
Each developer has a favourite programming language and obviously, it will be the one that he is working on. The general notion is that the most popular programming language is the best in the business. However, it is not true. Different languages serve different purposes. You can’t rank one over the other. While choosing a programming language, consider certain aspects such as business requirements, existing technology stack, developers’ expertise, license and usage costs etc.
2) Coding Knowledge is enough to Build a Product
Most novice and inexperienced developers believe that coding knowledge is enough to build a product. While it is true that you need to learn the code to build a product, software development is not just about knowing how to write the code. You need to have domain knowledge, understand the subject area, think from a customer/user perspective etc. You should be able to think beyond the IT space.
3) Software Development is Expensive
Considering the fact that software engineers are highly paid in the industry, small and medium businesses tend to purchase generic software instead of choosing custom application development. However, a ‘one-size-fits-all’ solution doesn’t suit today’s dynamically changing IT era. When business and user requirements change, realigning IT solutions to meet these needs becomes a challenge. Moreover, when the company grows, you’ll have to rewrite the software.
4) Latest Tools are not always the Best
Often, people believe that using the latest cutting edge tools will make their technology stack robust, powerful and efficient. However, it is not always true. The criteria in choosing a software tool should be the performance, functionality, features, being future-proof, adaptability etc. and not on its popularity. If the tool is not backward-compatible, you’ll have to rewrite your app every time there is an update to the code. So, popularity is not a silver bullet.
5) More People in the Team means Faster Time to Market
In today’s fast-paced world, businesses are required to deliver products faster. As such, people tend to hire more developers to quickly get the work done. Especially, organizations hire more software engineers when the project fails to meet the deadlines. However, adding software engineers to the team doesn’t always expedite the process. It can sometimes become a bottleneck, owing to communication and collaboration issues. A better way is to streamline and orchestrate operations, design the right CI/CD pipelines, apply automation etc.
6) The Project is Done once it goes Live
A software product development project involving various phases such as planning, design and development, testing and deployment. A common notion is that the project is done once the app is uploaded to the app store. However, it is not true. Once the app is available for users, you should monitor the performance, collect feedback and apply changes and updates as and when required. When you don’t update the app for a long time, it might get removed from the app store. In today’s customer-centric product environment, a software engineer job will end only when the app ceases to exist for users.
7) Remote Software Development is Expensive
One common myth in software development circles is that outsourcing software development projects to remote teams incur huge expenses. When you outsource a project to a 3rd party, you will get access to highly experienced professionals. At the same time, you don’t have to deal with the complex hiring process, HR issues, insurance, labour benefits etc. It means you will get the best talent and only be paying for the technical expertise while receiving a quality product in return. The key here is to choose the right outsourcing company for your IT needs.
8) Agile development methods are Complex to Handle
While the IT world is rapidly innovating, agile and DevOps methodologies are becoming an inevitable option. However, some organizations are apprehensive to embrace these methods as they feel it will be difficult to manage cross-functional teams. Implementing a cultural change across the organization is another challenge. So, they continue with the waterfall development process. While the waterfall method seems easy at the beginning, you will end up struggling with flexibility, adaptability, mobility and UI/UX issues once the app is launched.
9) Quality Tools build Quality Products
Often, people believe that choosing a high-quality tool will help them to build a quality product. However, the quality of the product doesn’t depend only on a tool but requires critical thinking, analysis, project planning, communication and collaboration and coding skills etc. Choosing the right tool makes your job easier.
10) Outsourcing is a one-stop solution for all IT problems
Outsourcing is a popular method for organizations to get things done. However, a popular myth is that outsourcing is a one-stop solution for any IT problem and it solves all issues which is not true. Outsourcing is basically done so that the organization can focus on their core processes while the outsourced company handles their IT needs. However, outsourcing comes with its challenges. It is important to choose the right engagement model. When you choose a fixed price model, you might experience service level issues and quality issues. Choosing a dedicated team model is good but it again depends on the company that you select for that project.
Conclusion
Software development is a popular industry that is always evolving. Today’s innovation is tomorrow’s legacy. So, organizations should proactively monitor IT trends and customer requirements and adapt them quickly. Businesses that take application development seriously are sure to surge ahead of the competition.

Top 5 Things to Know before Starting Product Engineering
 As businesses are transitioning from a product-driven business model towards a customer-centric development approach, product engineering is rapidly gaining prominence in recent times.
Product engineering services integrate software development services with product management, enabling organizations to align user requirements and user experience with business requirements and objectives while optimizing costs.
As your products define your company, it is essential to implement product engineering in the right way to build quality products faster and better.
Here are top five things to know before starting product engineering.
1) Product Engineering Roles and Responsibilities
Before jumping onto product development, it is critical to understand the difference between product engineering and product development. Though both terms look similar from a general perspective, they differ in roles and responsibilities. While product development is a broader term that involves every phase of the product lifecycle, product engineering is part of this product development that combines software engineering and product management. Be it an app, software or a business system, the role of a product engineer is to cost-effectively design a customer-centric product, implementing the right technology stack and methodologies while aligning them with business objectives and goals. It involves planning, design, development, testing, deployment and sustainable maintenance of the product.
2) Full-Stack Engineer is Different from a Product Engineer
Often, a full-stack engineer is confused with a product engineer. A full-stack engineer is responsible for developing the back-end and front end systems and integrating them via APIs. However, their role is limited to managing software, tools and human resources within specific work frames. However, product engineers have a broader role to play, from designing and deploying the product to ensuring that customers are satisfied with the product. When you clearly identify this thin line and rightly define roles and responsibilities, product engineering becomes efficient, easy and cost-effective.
3) The Importance of the Right Product Development strategy
Product engineers are responsible for delivering a quality product while considering development timelines and budgets. So, defining the right strategy for product development is the key. Firstly, consider the operational aspect of the product such as its efficiency, consistent performance, security, usability and costs etc. Secondly, mobility is a key requirement in today’s cloud and mobile era. So, consider portability, adaptability, reusability and interoperability. Thirdly, a modular design offers flexibility, self-repairing/self-healing and scales easily. You can easily perform maintenance tasks. With the right development strategy in place, the project becomes easily manageable.
4) Drive Innovation with Calculated Risks
Innovation is a key ingredient of a product that not only adds value to the product but also helps you to sustain the competition. However, innovation comes with certain risks. So, researching, collecting and analysing relevant data, analysing the future functionality of the product, identifying market gaps in that area and coming up with the feasibility of the product is recommended. Before moving ahead with the development, it is important to document specifications requirements. It can be done during the time of preparing a roadmap and designing the architecture of the product.
5) Seamless Collaboration across Teams
When it comes to product development, different teams have different goals and metrics. Product engineers envisage a product that scores high in quality, usability and durability while delivering better functionality. On the other hand, designers are concerned about the aesthetics and appearance of the product. Delivering a higher user experience is their key requirement. While developers love adding more features, the network guys are against it. Their motto is that fewer changes mean more stability. As such, collaborating with various teams and coming up with a common plan helps you strike the right balance between features, design and stability and expedite the product while increasing the quality as well.
The business world is rapidly evolving, putting constant pressure on product development teams. Today, businesses should proactively monitor changing market trends and realign their IT solutions accordingly. Product engineering services help you to cost-effectively build quality products faster while ensuring higher customer satisfaction. Businesses that ignore product engineering are sure to stay out of competition.
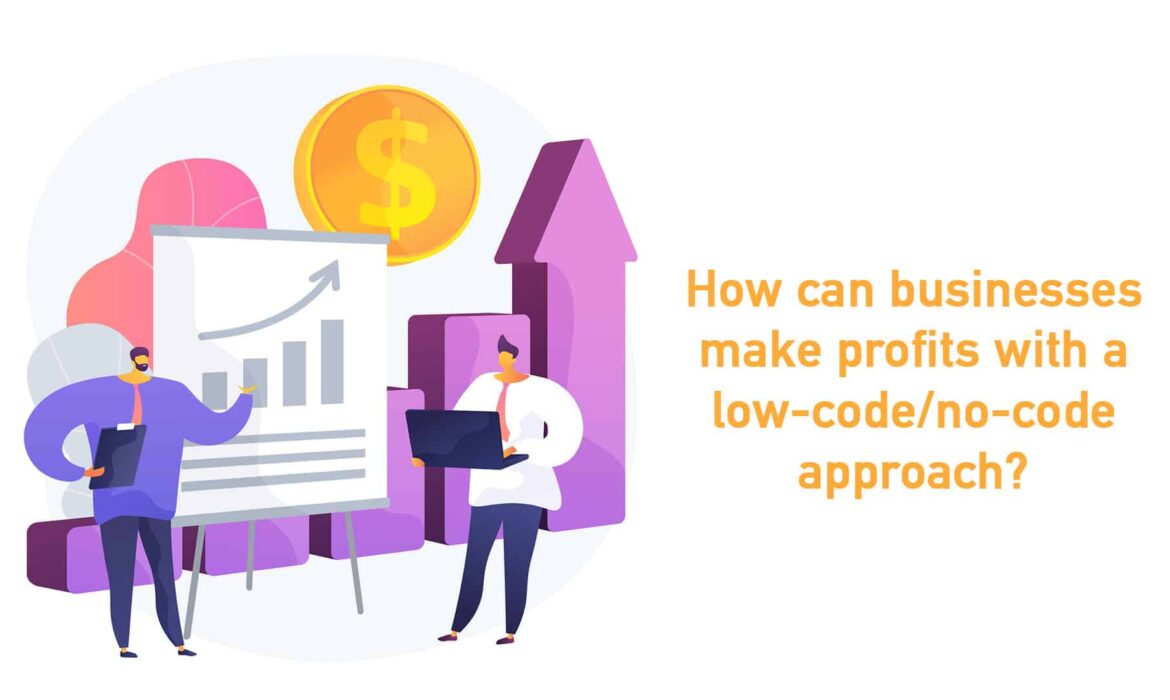
How can businesses make profits with a low-code/no-code approach?
 The year 2021 seems to be the year of low-code / no-code app development. Though the low-code approach is still in its nascent stage, businesses are already reaping benefits from it.
The month of June has already seen some interesting announcements related to low-code / no-code app development.
Mendix Shows the Way
A notable announcement came from Mendix on June 8, 2021, stating that Dutch’s largest insurance company TVM has partnered with Mendix to develop Bumper, a low-code app that accelerates damage claims processes.
When a vehicle meets with an accident and gets damaged, you can instantly add the damage details into the app and get a detailed report of the damage. It helps you to smartly process damage claims while giving you insights into the process in real-time. As such, damage claims are quickly and efficiently processed while delivering high customer satisfaction.
Amazon Web Services (AWS) enters the Low-code Arena
On June 17 2021, Amazon Web Services (AWS) announced the launch of Workflow Studio, a low-code app development tool that enables organizations to quickly build applications with minimal coding skills on its public cloud platform. So, how do businesses benefit from this AWS low-code / no-code offering?
AWS cloud infrastructure accounts for a majority of cloud usage across the globe. As most businesses run their cloud networks on AWS, it becomes easy for them to take advantage of low-code solutions. While developers use this platform to quickly build applications, business teams with zero coding knowledge can create their apps for day to day business activities. Low-code apps offer faster time to market, reduce development costs, HR-related costs, office footprint etc. It also helps businesses in dealing with the shortage of qualified software professionals.
UI / UX gets better with Infragistics
Low-code or no-code app development platforms focus on enabling users to quickly build apps without writing lengthy code. Regardless of the level of coding, users can quickly build apps using drag-n-drop tools. However, User interface (UI) and User experience (UX) has been a concern for businesses. Currently, low code platforms help you to convert your idea into a prototype while not concentrating on the user experience. Infragistics is now filling this gap.
Cross-platform UI/UX toolmaker Infragistics released a new product Infragistics Ultimate 21.1 on 17th June 2021 which aims to deliver the right UI/UX designs while building low-code apps. It helps business teams to build highly intuitive dashboards with the right UI/UX design. Currently, the IT industry is in shortage of experienced UI/UX professionals. The average salary of a UX designer in the US is $96,529 along with a cash bonus of $5000 per year, as reported by Indeed. San Francisco is the highest paying state for UX designers, paying $140,975 per annum. With Infragistics Ultimate 21.1, organizations can incorporate UI/UX designs into the apps using pre-built templates and tools. As such, businesses can save huge amounts on UI/UX professionals’ salaries while also overcoming the shortage of experienced UI/UX professionals. It also expedites software development projects. As such, businesses deliver a much better customer experience.
Looking at the entrance of IT giants into this segment, it becomes evident that low-code is not just a business hype but is delivering results. So, organizations need to tap these business benefits at the earliest.
Here are 5 important areas wherein businesses are making profits with low-code development:
BizDevOps
BizDevOps is a new buzzword in the development circles in recent times. Low-code app development extends DevOps, incorporating business staff into cross-functional teams to develop customer-centric apps. When a team has a clear understanding of the value stream of the project, customer end-to-end lifecycle, company strategy and business objectives, quality products are built faster and with reduced costs. Shadow IT can be effectively controlled.
Accelerate your Microservices Journey
As businesses are moving away from monolithic systems towards a microservices architecture, low-code app platforms accelerate this process by enabling you to quickly re-architect monolith functions into microservices via APIs. You can start with low-risk apps that highly impact your business processes.
Self-serving customer-centric portals
Business teams that are involved with customers know what customers need from a business. Searching for the company services, getting a quote, paying bills, getting an answer is a few of them. As such, business teams without coding knowledge can quickly build a self-serving web portal to address customer-specific needs. In addition, companies can quickly build a mobile app and serve customers.
Optimized Costs
Low-code / no-code app development platforms eliminate the need to hire expensive software engineers. With low-code platforms, you can quickly and cost-effectively build and deploy business applications with ease. Advanced features and integration tasks can be handed over to senior developers. That way, you can reduce the software team size and the office footprint. While it saves operational costs, you don’t have to go through the tedious hiring process. Bonuses, insurances and HR-related compliances can be avoided too.
Customer satisfaction is the key
Apps build on low-code platforms are highly customer-centric as they are built by people who interact with customers. Often, sales guys complain about the inefficient processes designed by IT teams that will make the customer leave away before closing a sale. When the sales guy creates the app, he knows what should be included and what shouldn’t. So, businesses can make more sales and generate revenues. More satisfied customers mean repeat business and new references as well.
Several companies have already started to benefit from low-code app platforms. What about your organization?
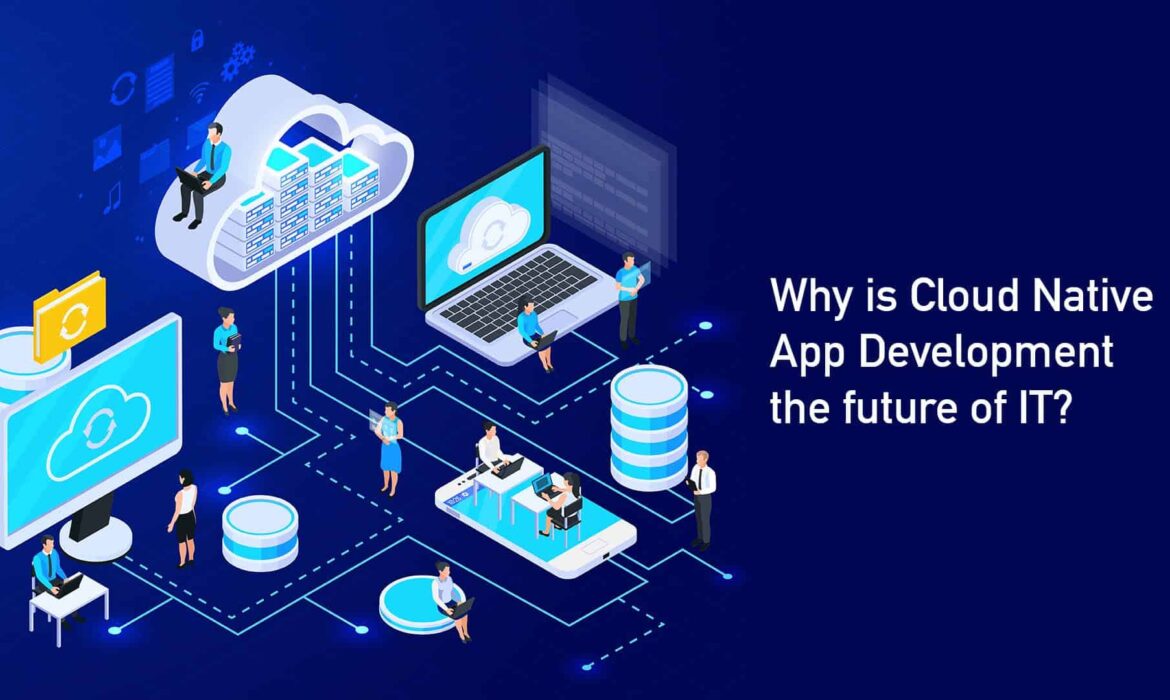
Why is Cloud Native App Development the future of IT?

The above quote is apt for this cloud computing era. Today, businesses are looking at the past and changing their current IT operations accordingly.
However, it is important to look at the future to stay in and ahead of the competition.
The constant change that happens in the IT landscape has accelerated with the advent of cloud computing.
As every IT product or resource is delivered over the Internet as a service, it is high time that software developers realign their software development strategies to suit the cloud landscape.
Cloud native app development is the right approach to make your businesses future-proof. The covid-19 pandemic that pushed businesses into a work-from-home environment compliments the cloud native app development.
What is Cloud Native App Development?
Cloud native app development means different things for different people. On a simpler note, it is an approach to building future-proof cloud apps that take advantage of cloud processes and platforms to deliver a consistent user experience across all devices, cloud models and environments.
Portability, high scalability and adaptability are the three key aspects that are driving cloud-native app development in IT circles in recent times. While business processes are rapidly changing, businesses are required to quickly adapt to these changes and build cloud native apps. Secondly, these apps should deliver a consistent user experience across a range of devices which means portability is the key requirement. They should be scalable enough to meet traffic spikes. Cloud native app development offers these 3 key qualities to IT processes.
Here are some key components of cloud native apps:
Microservices Architecture
Microservices architecture is a type of software architecture wherein complex applications are built as small, loosely coupled, independent and autonomous services that perform a specific task and communicate with each other via APIs. It is a variant of Service-Oriented Architecture (SOA) that enables developers to quickly build and deploy applications.
Microservices architecture allows businesses to quickly adapt to changing IT requirements as applications built using this architecture are flexible and easily extendable to suit different IT environments. So, you don’t have to code apps from scratch for each IT environment. You can begin small and massively scale up within a quick time. Moreover, these independent services allow you to scale specific services instead of scaling the entire app. The biggest advantage is that you can customize your technology stack based on your cloud environment without getting stuck with a standard approach.
Containers
As applications are centralized hosted and delivered over the cloud, portability becomes a key requirement. Containerization enables you to virtualize the operating system and run applications inside containers. A container is a portable computing environment comprising binaries, libraries, dependents and other configuration files required by an application. By using software containers, businesses can easily run applications on various environments such as mobile, desktop, cloud, bare metal, virtual machines etc. Software containers bring a greater level of agility, portability and reusability that are important for cloud native applications.
Software-Defined Infrastructure
As cloud services are centrally hosted and accessible from any location, administrators should be able to manage the infrastructure from anywhere as well. Software-defined infrastructure virtualizes hardware infrastructure, enabling you to automatically add, delete, stop and start any network resource using software from any location. By implementing software-defined infrastructure, cloud native apps can be easily managed from any location.
Application Programming Interface (API)
Application Programming Interface (API) is an interface that facilitates communication between different applications or services. As cloud native apps are built as multiple services, they use APIs to communicate with each other as well as with other 3rd party applications. For instance, if you want to add multiple languages to your app, you can use the Google Translate API without writing the code from scratch.
DevOps
As cloud native apps use the microservices architecture to build services as small and incremental blocks, continuous integration, continuous testing and continuous deployment becomes a key requirement. DevOps helps you to rapidly build and deploy quality cloud native apps.
Why Cloud Native App Development is the Future?
As businesses are aggressively embracing cloud technology, cloud native apps are turning out to be a beneficial option. Cloud native apps are faster to market and minimize risks. They can be easily deployed and managed using Docker and Kubernetes. Along with fault tolerance, they are capable of self-healing for most issues.
As these apps use a modular design, developing them is easy and cost-effective. Different teams can separately work on each service. Most importantly, when these apps are deployed, you can turn off some services that are not running. That way, you can significantly save operational cloud costs. The serverless and open-source model allows you to optimize the pay-per-use subscription model by reducing the computing time to milliseconds. You can scale up specific services too. Cloud native apps allow you to implement an auto-scale feature that automatically scales specific services without manual intervention. This is why most enterprises prefer cloud native apps. The downtime for cloud native apps is minimal as they can quickly pick up on alternation regions when a server goes down.
As most mobile apps use web-centric programming languages such as Python, PHP, JavaScript, Ruby, cloud native apps that are built on similar environments would perform well and deliver a consistent user experience. Now, developers don’t have to worry about the target environment but focus on business requirements and features. Adding new features or making changes to the app is easy as well. Enterprises love cloud native apps as they are easy to monitor and manage using apps such as AppDynamic, NewRelic etc. Similarly, you can debug them using apps such as Splunk and ElasticSearch.
Challenges with Cloud Native App Development
Cloud native app development comes with certain challenges as well. The biggest challenge is the presence of hundreds of services. Developers should be careful while handling and integrating all these services. They should also keep an eye on the size of the service. It is recommended to minimize the number of services wherever possible.
Secondly, data security and storage requires careful attention. As enterprise run containers on immutable infrastructure, the entire internal data goes off when you shut down the app. So, you should make sure that the data is securely stored. In addition, when an app uses APIs of a specific cloud platform, you should be careful to manage that API while migrating to another environment. Moreover, protecting data from unauthorized access is important.
As the cloud becomes an integral part of business processes, choosing cloud native app development helps you keep your infrastructure future-proof!
Accelerate Digital Transformation in your Organization with Low-Code/No-Code Application Development
Low-code or No-code app development is a method of creating code using a visual application development environment wherein users can drag n drop components and connect them to build applications of all types.
Beacon technology for Asset Tracking
The advent of Internet of Things (IoT) has not only revolutionized IT networks but it also paved way for a range of new and innovative technologies. The beacon technology is one among them. Right from the time when Apple introduced the beacon technology in 2013 to till date, the technology has greatly evolved and is getting better every day. While the beacon technology was initially used by retail businesses, its functionality is now being extending to every field. Asset tracking with beacons is the new trend. Using the beacon technology, businesses are now able to implement cost-effective and highly scalable asset tracking solutions.
An Overview of Beacons
A beacon is a small Bluetooth-based device that is used to continuously transmit radio signals. This small form factor device contains a small radio transmitter and a battery. It uses the Bluetooth Low Energy(BLE) protocol to transmit data. As BLE consumes low energy, you can run beacons without draining out the battery. Depending on the size and functionality of the device, beacon batteries can last from 6 months to 5 years. However, it transmits low amounts of data which means you can’t transfer audio or streaming data.
The beacon technology is similar to Near-field Communication (NFC) technology. However, the difference lies in the range. While NFC functions within 8 inches, beacons can work within a range of 70 meters.
The State of Beacon Market
Beacons have become the first choice for many companies when it comes to Real-Time Location System (RTLS) solutions. According to Grandview Research, the global Bluetooth beacon market is expected to reach $58.7 billion by 2025, growing at a CAGR of 95.3% between 2017 and 2025. Similarly, Allied Market Research reports that the global beacon market would reach $14.839 billion by 2024, growing at a CAGR of 61.5% between 2018 and 2024. GM Insights reports that the market value of beacons was $170 million in 2016. This value is expected to grow at a CAGR of 80% between 2017 and 2024. The retail industry is the largest market for beacons followed by the health sector.
 Source: https://www.statista.com/statistics/827293/world-beacons-technology-market-revenue-by-end-user/
Analyst firm Statista reports that the global beacon market was valued at $519.6 million in 2016. This value is expected to reach $56.6 billion by 2026, growing at a CAGR of 59.8% between 2016 and 2026.
The Technology behind Beacons
Beacons perform a single task. They just send a radio signal at pre-defined intervals. BLE-enabled devices such as smartphones receive these signals and act accordingly. Each beacon is assigned with a unique identifier. So, the device transmits this unique identifier which enables the receiver to identify the location of the beacon as well as the location of the user.
A beacon contains a small ARM (Advanced RISC machines) computer, Bluetooth connectivity module and a small battery. This small CPU runs the firmware written in low-level programming that controls the behaviour of the beacon. As the beacon’s job is to transmit its identifier, the small CPU power and battery is more than sufficient to process this data or encrypt the identifier. Inside the beacon you will find a small antenna that transmits electromagnetic waves. It uses the Bluetooth protocol. The latest Bluetooth standard is 4.2. The normal frequency of the beacon radio waves is 2.4 GHz and the maximum data limit for the 4.2 standard is 257 bytes. With such small amount of payload, beacons transmit the UUID, major, minor and the signal power. The receiving devices calculate the proximity of the beacon based on the transmitted signal power.
Beacon transmits the following components
Universally Unique Identifier (UUID): It is the unique identifier that differentiates your beacons from other devices outside your network.
Major Value: It is the unsigned integer value that tells you about the group in which the beacon is placed. For instance, beacons installed in the 1st floor will have the same major value. The value can be anything between 1 and 65535.
Minor Value: It is the unsigned integer that differentiates a beacon from a group. The value falls between 1 and 65535.
Here is an example of a UUID:
f626db6-3ga2-4e98-8013-bc5b71f0983c
When you talk about a beacon, you think about a physical device. However, some smartphones can act as a transmitter as well as a receiver. For instance, Apple doesn’t offer any physical beacon. It has incorporated the beacon technology into iOS 7 operating system. With more than 200 million iOS 7 devices in the market, Apple already has a considerable amount of beacons in the market.
How are beacons useful?
Beacons don’t relay any important message. They simply relay their IDs. It is the job of the receiver device to apply this information into a useful solution. For instance, a retail mall installs beacons inside the mall. When a customer visits the store and browses the electronic section of the mall, the beacon installed at that place will transmit its ID. The app in the smartphone of the customer will receive the ID and identifies the location of the customer. In this case, the app identifies that the customer is at the electronics section. So, the app will send discounts and offers related to the electronic products of that mall. Moreover, these offers would be specific and customized for that customer.
Asset tracking with Beacons
Asset tracking and management is a key requirement for any industry. Beacons can significantly reduce the cost and complexity of this job. There are multiple ways to track assets using beacons. For instance, you can mount BLE receivers in a permanent fixture and tag assets to beacons. When an asset comes into proximity of a BLE-enabled receiver, it tracks the movement via mobile data or Wi-Fi and logs the data. You can either take action or store the information for management and analytics purposes. Using beacons, you can cost-effectively track thousands of assets in real-time, 24/7.
There are instances wherein you cannot mount BLE receivers in permanent fixtures in temporary locations such as conference halls or function halls. In such cases, you can fix beacons in different places and track assets using a mobile app. By tagging assets to beacons, you can track each asset from the mobile app. Implementation is easy as there is no need for wiring or costly installation.
For more accuracy and maximum coverage, you can augment the beacon setup with additional receivers. You can install fixed beacons and fixed BLE receivers and augment them with moving beacons and moving BLE receivers. This setup can be extremely useful in low-signal areas such as ICUs of a hospital or a high-security airport check points. In areas such as large construction sites, environments quickly change. As such, you need a dynamic beacon architecture. In such cases, you can complement beacons with GPS and Wi-Fi. Depending on your environment, business type and requirement, you can choose the right deployment beacon technology.
Asset tracking with beacons is quickly gaining traction. Reports show that beacons have significantly reduced operational costs of asset management tasks. According to a Proximity Directory report, a total of 15,176,500 proximity sensors were installed globally in Q2, 2017. And, asset tracking with beacons is saving billions of dollars for the $9.1 billion logistics industry. Similarly, the health industry can save hundreds and thousands of dollars with an ROI of 275% by using asset tracking with beacons.
The advantages of beacons are enormous. Using beacons, you can track every item in the warehouse, track vehicles within the infrastructure, track equipment and machinery in a healthcare location, track luggage trolleys in airports, railway stations etc. In addition, you can track people/employees by giving them BLE-enabled devices.
Bluetooth 5.0 is offering additional capabilities in the form of 2x speed, 800% more broadcast messaging capacity and 4x range. As such, beacons are sure to disrupt the RTLS solutions in the coming days.
Source: https://www.statista.com/statistics/827293/world-beacons-technology-market-revenue-by-end-user/
Analyst firm Statista reports that the global beacon market was valued at $519.6 million in 2016. This value is expected to reach $56.6 billion by 2026, growing at a CAGR of 59.8% between 2016 and 2026.
The Technology behind Beacons
Beacons perform a single task. They just send a radio signal at pre-defined intervals. BLE-enabled devices such as smartphones receive these signals and act accordingly. Each beacon is assigned with a unique identifier. So, the device transmits this unique identifier which enables the receiver to identify the location of the beacon as well as the location of the user.
A beacon contains a small ARM (Advanced RISC machines) computer, Bluetooth connectivity module and a small battery. This small CPU runs the firmware written in low-level programming that controls the behaviour of the beacon. As the beacon’s job is to transmit its identifier, the small CPU power and battery is more than sufficient to process this data or encrypt the identifier. Inside the beacon you will find a small antenna that transmits electromagnetic waves. It uses the Bluetooth protocol. The latest Bluetooth standard is 4.2. The normal frequency of the beacon radio waves is 2.4 GHz and the maximum data limit for the 4.2 standard is 257 bytes. With such small amount of payload, beacons transmit the UUID, major, minor and the signal power. The receiving devices calculate the proximity of the beacon based on the transmitted signal power.
Beacon transmits the following components
Universally Unique Identifier (UUID): It is the unique identifier that differentiates your beacons from other devices outside your network.
Major Value: It is the unsigned integer value that tells you about the group in which the beacon is placed. For instance, beacons installed in the 1st floor will have the same major value. The value can be anything between 1 and 65535.
Minor Value: It is the unsigned integer that differentiates a beacon from a group. The value falls between 1 and 65535.
Here is an example of a UUID:
f626db6-3ga2-4e98-8013-bc5b71f0983c
When you talk about a beacon, you think about a physical device. However, some smartphones can act as a transmitter as well as a receiver. For instance, Apple doesn’t offer any physical beacon. It has incorporated the beacon technology into iOS 7 operating system. With more than 200 million iOS 7 devices in the market, Apple already has a considerable amount of beacons in the market.
How are beacons useful?
Beacons don’t relay any important message. They simply relay their IDs. It is the job of the receiver device to apply this information into a useful solution. For instance, a retail mall installs beacons inside the mall. When a customer visits the store and browses the electronic section of the mall, the beacon installed at that place will transmit its ID. The app in the smartphone of the customer will receive the ID and identifies the location of the customer. In this case, the app identifies that the customer is at the electronics section. So, the app will send discounts and offers related to the electronic products of that mall. Moreover, these offers would be specific and customized for that customer.
Asset tracking with Beacons
Asset tracking and management is a key requirement for any industry. Beacons can significantly reduce the cost and complexity of this job. There are multiple ways to track assets using beacons. For instance, you can mount BLE receivers in a permanent fixture and tag assets to beacons. When an asset comes into proximity of a BLE-enabled receiver, it tracks the movement via mobile data or Wi-Fi and logs the data. You can either take action or store the information for management and analytics purposes. Using beacons, you can cost-effectively track thousands of assets in real-time, 24/7.
There are instances wherein you cannot mount BLE receivers in permanent fixtures in temporary locations such as conference halls or function halls. In such cases, you can fix beacons in different places and track assets using a mobile app. By tagging assets to beacons, you can track each asset from the mobile app. Implementation is easy as there is no need for wiring or costly installation.
For more accuracy and maximum coverage, you can augment the beacon setup with additional receivers. You can install fixed beacons and fixed BLE receivers and augment them with moving beacons and moving BLE receivers. This setup can be extremely useful in low-signal areas such as ICUs of a hospital or a high-security airport check points. In areas such as large construction sites, environments quickly change. As such, you need a dynamic beacon architecture. In such cases, you can complement beacons with GPS and Wi-Fi. Depending on your environment, business type and requirement, you can choose the right deployment beacon technology.
Asset tracking with beacons is quickly gaining traction. Reports show that beacons have significantly reduced operational costs of asset management tasks. According to a Proximity Directory report, a total of 15,176,500 proximity sensors were installed globally in Q2, 2017. And, asset tracking with beacons is saving billions of dollars for the $9.1 billion logistics industry. Similarly, the health industry can save hundreds and thousands of dollars with an ROI of 275% by using asset tracking with beacons.
The advantages of beacons are enormous. Using beacons, you can track every item in the warehouse, track vehicles within the infrastructure, track equipment and machinery in a healthcare location, track luggage trolleys in airports, railway stations etc. In addition, you can track people/employees by giving them BLE-enabled devices.
Bluetooth 5.0 is offering additional capabilities in the form of 2x speed, 800% more broadcast messaging capacity and 4x range. As such, beacons are sure to disrupt the RTLS solutions in the coming days.
Hybrid Cloud Architecture with CISCO CSR 1000v
Cisco CSR 1000v series is a router software appliance from Cisco. It provides enterprise routing, VPN, Firewall, IP SLA, and more.CSR 1000v can be used to connect multiple VPC across all-region in AWS Cloud and on-premise networks. Thus it can be used avoid managed VPN service from AWS.
In AWS, you can find Cisco CSR 1000v in AWS marketplace which has 30 days free trial to test it out. AWS Marketplace for Cisco. Be aware this is not cheap, it will cost you EC2 Instance charges. All instance types are not supported for CSR 1000v. It supports only m3 and c3 instance family types.
Cisco CSR 1000v Can be used in various network models in cloud like Transit VPC, multi-cloud Network.
Following is the Architecture I have used to connect multiple VPC.

The two VPC’s are one in N.Virginia region and other is in Ohio Region. And Each VPC has Internet Gateway and were connected over VPN. On Ohio region, we used AWS managed VPN service to connect VPC in N.Virginia region VPC. And On-Premise Edge Router we used Cisco RV110W small business router. In this Post, I would like to mention the steps to follow to establish VPN over two VPC’s spread in two different regions in AWS.
Steps to create VPC’s in two regions:
- Create VPC in N.Virginia Region with CIDR 10.0.0.0/16 and attach Internet Gateway to it. you can do it from CLI or through the management console.
aws ec2 create-vpc --cidr-block 10.0.0.0/16 --region us-east-1 Output: { "Vpc": { "VpcId": "vpc-848344fd", "InstanceTenancy": "dedicated", "Tags": [], "CidrBlockAssociations": [ { "AssociationId": "vpc-cidr-assoc-8c4fb8e7", "CidrBlock": "10.0.0.0/16", "CidrBlockState": { "State": "associated" } } ], "Ipv6CidrBlockAssociationSet": [], "State": "pending", "DhcpOptionsId": "dopt-38f7a057", "CidrBlock": "10.0.0.0/16", "IsDefault": false } } aws ec2 create-internet-gateway --region us-east-1 Output: { "InternetGateway": { "Tags": [], "InternetGatewayId": "igw-c0a643a9", "Attachments": [] } } aws ec2 attach-internet-gateway --gateway-id <<IGW-ID>> --vpc-id <<VPC-ID>> --region us-east-1 - Create two subnets in N.Virginia Region VPC, one for CSR 1000v with CIDR 10.0.0.0/24 and another subnet with CIDR 10.0.1.0/24.
aws ec2 create-subnet --cidr-block 10.0.0.0/24 --vpc-id <<VPC-ID>> --region us-east-1 Output: { "Subnet": { "VpcId": "vpc-a01106c2", "AvailableIpAddressCount": 251, "MapPublicIpOnLaunch": false, "DefaultForAz": false, "Ipv6CidrBlockAssociationSet": [], "State": "pending", "AvailabilityZone": "us-east-1a", "SubnetId": "subnet-2c2de375", "CidrBlock": "10.0.0.0/24", "AssignIpv6AddressOnCreation": false } } aws ec2 create-subnet --cidr-block 10.0.1.0/24 --vpc-id <<VPC-ID>> --region us-east-1 Output: { "Subnet": { "VpcId": "vpc-a01106c2", "AvailableIpAddressCount": 251, "MapPublicIpOnLaunch": false, "DefaultForAz": false, "Ipv6CidrBlockAssociationSet": [], "State": "pending", "AvailabilityZone": "us-east-1b", "SubnetId": "subnet-2c2de375", "CidrBlock": "10.0.1.0/24", "AssignIpv6AddressOnCreation": false } } - Create Route Table in N.Virginia VPC which will have the default route to Internet Gateway.And associate CSR subnet to it.

4. Launch the CSR 1000v from AWS MarketPlace with the one-click launch. Link To AWS Marketplace, you can ssh into the CSR 1000v instance using ec2-user.Attach Elastic IP to the CSR instance which will act as Customer Gateway in N.Virginia Region VPC. In later steps, we will configure the router to add Static routes to other subnets in VPC and setting BGP to propagate routes over VPN Connection with other VPC.
5. In a similar fashion create VPC in AWS Ohio region with CIDR 10.1.0.0/16 And create two subnets with CIDR 10.1.0.0/24 and 10.1.1.0/24
Steps to Create VPN connection in AWS Ohio VPC
- Create Customer Gateway. Open VPC management console at console.aws.amazon.com. In navigation pane choose Customer Gateway and then create new Customer Gateway. Enter Name, Routing type as Dynamic and EIP of the CSR 1000v instance in N.Viriginia Region VPC. ASN number is 16-bit and must be in the range of 64512 to 65534.

- Create VPG and attach to the VPC.In the Navigation Pane choose Virtual Private Gateway and create VPG.
- Now Create VPN connection. In Navigation Pane Choose VPN Connection, Create New VPN Connection. Enter the Name, VPG and Customer Gateway which we have created previously, select routing type as Dynamic and create VPN connection.
It will take few minutes to create VPN connection. When it is ready to download the configuration for Cisco CSR from the drop-down menu.
Steps to establish VPN Connection on CSR 1000v
- Add static routes of other subnets in VPC(N.Virginia) to CSR 1000v. Every subnet in AWS has a virtual router with IP address of Subnet CIDR +1. As CSR router will be in Subnet 10.0.0.0/24 the virtual router IP address will be 10.0.0.1. The Virtual Router on each subnet has a route to other all subnets in the VPC.
>Configure terminal #ip route 10.0.1.0 255.255.255.0 10.0.0.1 - Configure BGP. Choose the ASN number which you gave while creating Customer Gateway in Ohio VPC. Above we gave 64512
> Configure terminal
(config)#router bgp 64512
(Config-router)# timers bgp keepalive holdtime
(Config-router)# bgp log-neighbor-changes
(Config-router)# end
This step might not be necessary. But as good practice, I have applied the above configuration before copying the configuration file that is downloaded before.
- Apply the Configurations that are downloaded previously when VPN Connections Created. After you have applied those setting on CSR you can see on the management console that both the tunnels of VPN as UP.

Testing to check connectivity between two VPC’s
- Launch an instance in subnet1 in Ohio region VPC’s with Public IPv4. SSH into the instance and ping the CSR 1000v instance private IP.
- Similarly, you can check connectivity with Ohio Region VPC by pinging the instance in subnet1 in Ohio region VPC with its Private IP.
Troubleshooting :
> Route Propagation must be added to the route table in Ohio Region VPC.
> You must configure CSR 1000v as NAT, so the subnets in N.Virginia region can access the hosts in Ohio region VPC via CSR 1000v. You need to Update the route table with target fo CSR 1000v instance-id after making it as NAT.
> Allow ICMP in Security groups on all instances.
Thanks and Regards
Naveen
AWS Solution Architect @CloudTern